As I shared previously, I’ve been experimenting with AntiX Linux distro, a version of Linux intended for slower machines. I’m liking it better than Peppermint and Lubuntu, my top two favorites. It’s always a risk to deviate from UbuntuLinux distros, which I’m very comfortable with having used them for years, but Debian/Mepis distros aren’t too far off the beaten path.
Since I wanted to install Apache, MySQL (or rather, MariaDB which replaces MySQL since Oracle bought MySQL out), PHP, I decided to start that process.
Here are my notes on that process:
1) Install AMP on AntiX
Use meta-install (command line) or from Accessories–>Meta-Package Install from the Fluxbox menu on AntiX to get Apache, MySQL, PHP installed
 |
| Notice you have many options here…the one we’re interested in is Server, second from the bottom of the list. |
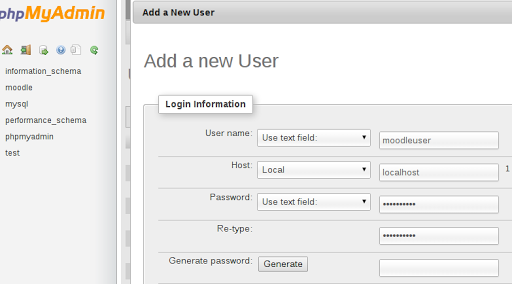
Simply click on the checkbox next to Server option in the window shown above, then click Install and wait patiently. You’ll be asked to enter your MySQL root password. Note that phpmyadmin is installed as well and will be available at http://localhost/phpmyadmin
2) Install php5 stuff to ensure compatibility with Moodle.
sudo apt-get install php5-curl php5-xmlrpc php5-gd php5-intl libapache2-mod-php5 libapache2-mod-ruby libapache2-mod-python php5 php5-common php5-dev php5-gd php5-idn php-pear php5-imagick php5-imap php5-mcrypt php5-memcache php5-ming php5-mysql php5-pspell php5-recode php5-snmp php5-sqlite php5-tidy php5-xmlrpc php5-xsl libapache2-mod-php5
Restart the web server with the command below:
sudo /etc/init.d/apache2 restart
3) Install MariaDB so as to replace MySQL.
This was a bit confusing for me, but…mostly because I wasn’t familiar with how AntiX stores it’s repositories. I was accustomed to working with ONE file for repositories (/etc/apt/sources.list) but AntiX actually stores several files. In the end, this approach makes more sense to me.
At the command line type:
lsb_release -a – this command will tell you what Debian distro you have. Here’s what I saw when I typed it on my AntiX install:
$ lsb_release -a
No LSB modules are available.
Distributor ID: Debian
Description: Debian GNU/Linux 7.0 (wheezy)
Release: 7.0
Codename: wheezy
Notice that Debian wheezy is what you have…keep that in mind.
cd /etc/apt/sources.list.d – this command will switch you over to the appropriate directory.
sudo leafpad mariadb.list – this command will open the leafpad text editor and create a file called “mariadb.list” which is where we’ll put the info we’re going to copy from the next step.
Switch to your Internet browser, and go to this web site.
https://downloads.mariadb.org/mariadb/repositories/
You will be asked to make some choices…here’s what they look like:

You just choose a distro (e.g. Debian), a release (wheezy), a version (e.g. 10 (the 5.5 didn’t work for me), and a mirror (e.g. I chose the one with the American flag, osuosl).
Scroll down and you will see more info:
#MariaDB 10.0 repository list - created 2013-02-17 14:18 UTC#http://mariadb.org/mariadb/repositories/
deb http://ftp.osuosl.org/pub/mariadb/repo/10.0/debian wheezy main
deb-src http://ftp.osuosl.org/pub/mariadb/repo/10.0/debian wheezy main
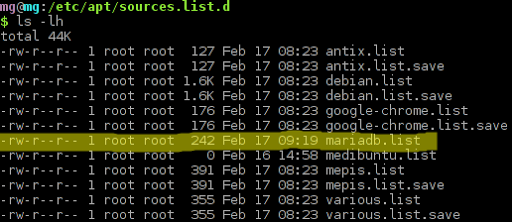
Exit Leafpad text editor, saving the mariadb.list file. If you type ls -lh you will get a directory listing showing the mariadb.list file:
type the following at the command line:
sudo apt-key adv --recv-keys --keyserver keyserver.ubuntu.com 0xcbcb082a1bb943db

sudo apt-get update

sudo apt-get install python-software-properties
To complete the install, type the following:
sudo apt-get install mariadb-server – this will install MariaDB server. You will be notified that MySQL will be removed, but…no problem. You will also be asked to type in the root password for your MariaDB just like you did with MySQL.

sudo /etc/init.d/apache2 restart


You will need to create a MoodleData directory. Here’s the command to do it:
sudo mkdir /var/moodledata
Since I like to put all my Moodle instances’ MoodleData folders as subdirectories of MoodleData, I would create new subdirectories in the following way:
sudo mkdir /var/moodledata/sandbox
If I needed to assign write access, I would probably do something like the following:
sudo chmod -R 777 /var/moodledata
b) Download the Moodle installation file
From the command line, you can download the Moodle installation file. For example:
wget “http://download.moodle.org/download.php/stable24/moodle-latest-24.zip”
should enable you to download the Moodle file. Once downloaded, you can unzip the file in this way:
unzip moodle-latest-24.zip
By the way, if the wget command pulls up a blank file (not one that is 30-40 megs in size), you may want to get the direct link for the Moodle install file download (click on the regular link and then before it starts to download, copy-n-paste the link for “direct link”). I sometimes use a URL shortener (goo.gl) to get a shorter link to work with if I have to type, rather than copy-n-paste, the link into the Terminal window.
c) Create folder where Moodle PHP files will be stored.
To create the folder where you will store the Moodle PHP files–these are the files you extracted after downloading and unzipping the file from above. You can create the folder with this command:
sudo mkdir /var/www/sandbox
where sandbox is the name of the proposed Moodle instance.
Then copy the contents of your downloaded, unzipped Moodle install file with this command:
sudo cp -rv /home/yourusername/moodle/* /var/www/sandbox/
d) Begin the web-based install process
Go to your web browser and type in the URL of the server, or, if on your own computer, type
You should see the start of the Moodle installation. Follow the steps suggested. After you’ve installed Moodle, you should see everything pop up as normal.
- Session Handling (View Video) – How to Deploy Multiple Moodle Instances on one server with different cookies
- Setting Up CRON Jobs (View Video: Part 1 | Part 2) – Read more about what is Cron. Use the Moodle Cron package. The simplest way is to use this little package MoodleCron-Setup.exe, which makes this whole thing very easy by installing a small Windows service. Run it and forget about it! 🙂
- Managing Courses
- Course Default Settings with a quick overview of group settings (View Video)
- Course Categories (View Video)
- Backing Up and/or Duplicating from Restored Course (View Video)
- Restoring Courses (View Video)
- How to Install Blocks/Modules into Moodle
- How to Install Themes into Moodle
Your Moodle will need to occasionally run cron jobs. Why is the cron job important?
Cron assists some of Moodle’s modules to perform tasks on a scheduled basis. For example, the cron process might tell Moodle to check all discussion forums so it can mail out copies of new posts to people who have subscribed to that forum. The primary Moodle script that does all this is located in the admin directory, and is called cron.php. However, it can not tell itself to run, so you need to set up a mechanism where this script is run regularly (eg every five or ten minutes). This provides a “heartbeat” so that the script can perform functions at periods defined by each module.
Read Cron – MoodleDocs
You can edit the cron job in the following way:
env EDITOR=nano crontab -e
Paste in a modified line of instructions for every Moodle instance you have running on the server:
*/10 * * * * wget -q -O /dev/null “http://localhost/sandbox/admin/cron.php”
Note that this line of instruction will run the cron job every 10 minutes. There are other ways of accomplishing this task, so be open to the possibilities!
To edit cron jobs, go to /etc/cron.weekly, /etc/cron.hourly, /etc/cron.monthly. For example:
cd /etc/cron.weekly
sudo apt-get install openssh-server unattended-upgrades

var _gaq = _gaq || []; _gaq.push([‘_setAccount’, ‘UA-3445626-5’]); _gaq.push([‘_setDomainName’, ‘mguhlin.org’]); _gaq.push([‘_trackPageview’]); (function() { var ga = document.createElement(‘script’); ga.type = ‘text/javascript’; ga.async = true; ga.src = (‘https:’ == document.location.protocol ? ‘https://ssl’ : ‘http://www’) + ‘.google-analytics.com/ga.js’; var s = document.getElementsByTagName(‘script’)[0]; s.parentNode.insertBefore(ga, s); })();
Discover more from Another Think Coming
Subscribe to get the latest posts sent to your email.
